Best Buy and Monitor Suspension
Sat Jan 29, 2011So I placed an order for something that's been a long time coming.
The same order will also contain a new wireless keyboard I'll be trying out. It does something a bit odd with the arrow keys, but other than that, seemed to work pretty well when I tried it in store.
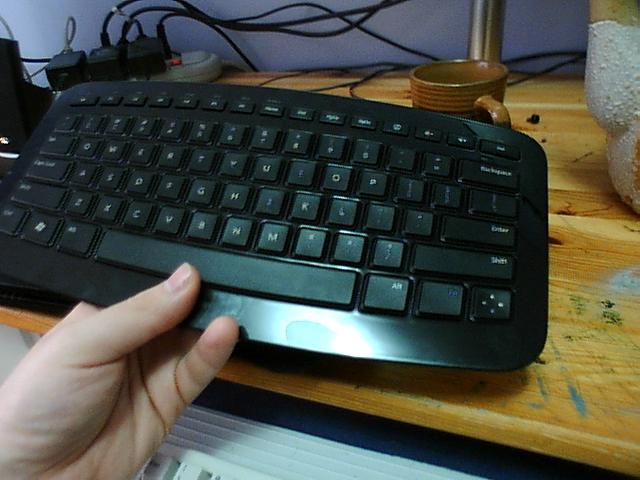
It probably won't to replace my keyboards of choice, but it'll function as a nice spare for working on off machines. It does have a much smaller receiver than the wireless keyboard I currently use in the livingroom, so it might find a permanent home there.
Now I'm used to ordering shit from newegg.ca, maybe I'm a bit spoiled, but this order was far from error free. So, for the benefit of people who want to get decent pricing on monitor arms, here's a guide to ordering things from BestBuy.ca with BestBuy gift cards.
Step 1 - Shop
Find the stuff you want and get it into your shopping cart (this works the same as on every online store ever).
Step 2 - Checkout
Click "Checkout". If you've never ordered something from BestBuy before, you'll need to register by telling them your email and setting your BestBuy password.
Step 3 - Address
Fill in your shipping and billing addresses (if you don't have them memorized, make sure to write at least the phone numbers down; you'll need to enter them a few times and the last phone field doesn't autocomplete for whatever reason).
Step 4 - Payment Information
Get your gift card out and enter the 16 digit number from the back (be sure to omit the spaces, the BestBuy devs don't believe in .replace()) then scratch off the security strip and enter the confirmation code. If you like, you can check the balance on your card before continuing just to make sure. Once you've entered your gift card info, click "Apply". This should cause your order to error, saying "ERROR: This order cannot be processed at this time. Please try again later.".
Step 5 - Address
You can't refresh, or hit back (well, you can, but you'll be prompted to refresh, at which point it will leave you with a blank form anyway) so just click on your cart and start the order again. Re-enter your addresses (if you just clicked "Add to Address Book" in step 3, note that your billing address is now entered in the shipping address fields, and your billing address fields are empty).
Step 6 - Payment Information
Re-enter your gift card numbers and click "Apply". This time your order should go through. After a short loading screen, you will be told that your "credit card" was declined (if you took more than 5 minutes to correct your address for whatever reason, you will instead be told that it has been 30 minutes since any activity and your connection has been terminated; either way proceed to the next step).
Step 7 - Address
Re-enter your addresses (make sure to correct the shipping address again).
Step 8 - Payment Information
Enter your gift card information. This time the order should go through (for realsies). You should get an on-screen receipt, which will contain your order number. Print this page (or at least save it as a PDF); you should get a copy emailed to you, but better to be safe.
Step 9 - The Aftermath
You will be sent a confirmation email, saying that your order has been accepted and will be shipped in two days. If your order contains items from multiple suppliers, you will get one confirmation per supplier. You will also get an email saying that your payment method was declined by the second supplier. This will happen even if you have enough money on the gift card. The second supplier will try to charge your gift card again the following day (you won't get a confirmation email if this succeeds but it should, with no action on your part, as long as you have enough balance remaining). Wait two days to see if the order ships before calling CS; they're very nice people, but they'll tell you no more than I just did, and they can't seem to help much in this situation.
And that's it. You've just ordered something from BestBuy. It'll be there in about four days via Canada Post expedited delivery. By "there", I mean "at the billing address".
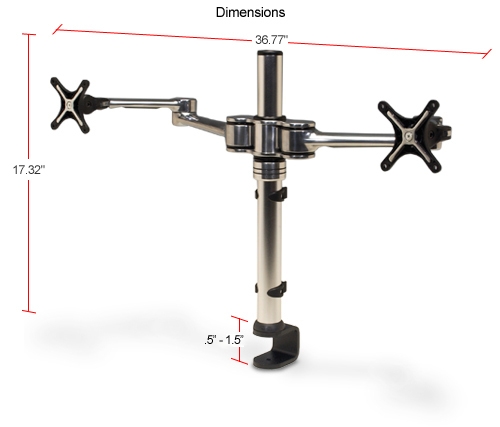
Monitor Arm
First impressions are pretty good, except that it didn't come with a key screw that would let me use the clamp option, so I'll need to drill a hole in my desk this weekend before I mount stuff. It's fully articulated and there's a pretty wide range of configurations possible (it may finally enable a sane 3-monitor setup). The main win for me is that I'll reclaim a lot of my desk space because the arm is tall enough to keep my monitors above theorking area (and I can move them out of the way in any case). It'll also even out my monitor options; currently I have an older Dell 23" wide-screen (which came with a fully rotatable/tilting stand), and an NEC 22" widescreen (which can basically just tilt about an inch).
One installation later...
It definitely evened out my setup; both of my monitors are now comfortably hovering 12" above my desk (right at eye level, which is the ergonomically correct placement as I understand). The reason that I know it's exactly 12" is that I had to use a 12" steel ruler to brace the monitor arm in order to keep it from sliding down the shaft. I'm going to Home Depot later this week to get a locking clamp, but in the meantime, the ruler is performing admirably. The arm says it's built for a pair of 24"/17.5lbs monitors. It's not. What they probably meant is that the joints won't warp or sever under that weight. It's doubtful anyone at the company actually tried to put this thing together with two 24" monitors, because they would have quickly realized that the main clamp doesn't grip strongly enough to keep the setup in place (or, they tried it with two featherweight monitors and didn't bother to note the weight difference in their media).
TLDR
Pros:
- Ergnomic positioning (and actually, really good cable management) for monitors.
- High degree of articulation (not as much as the stand on a Dell Profesional series monitor, but still respectable).
- Small footprint.
Cons:
- Be prepared to drill a hole in your desk for it (even if the correct screws had come with the unit for clamping, there are some positional limitations if you go that route)
- Be prepared to brace the main shaft if you have larger than 20" monitors (currently using a steel ruler in the wire cleft at the back, really should be using a locking ring clamp to support the one that came with it).
- If you have especially small/lightweight monitors and can pick this up cheap, go nuts, otherwise I honestly can't recommend it. I'm keeping mine because it's better than stacking books under my NEC to get it to eye level, and because of the small footprint, but I probably would have gone with another model had I known how flimsy the locking assembly is on this one.